The Little Acre walkthrough
About this walkthrough
This is a complete walkthrough for The Little Acre.
Using this walkthrough will get you through the game with the least amount of time and wandering around, but may spoil the game and fun of exploring.
Items which can be picked up as inventory items and items which can be constructed by combining or using other items are written with bold text for emphasis.
- Take the shirt that is covering Dougal.
- Take the stick from Dougal's mouth.
- Use the stick to get trousers. You will automatically get a sandwich from trouser pockets.
- Use the sandwich on Dougal. Dougal eats half of it, and you will get half sandwich.
- Use the stick on Dougal.
- Throw the half sandwich on sweater.
- When Dougal opens his mouth, replace the sweater with stick.
- Take boots.
- Use the ladder.
- Take the water jug to get an empty jug.
- Walk to back garden.
- Use the empty jug with water pump.
- Use the pump. It breaks, and you get a handle.
- Use the handle to open the shed door.
- Take the pitchfork from the floor.
- Return to the pump and use the pitchfork with the stump to get a makeshift hammer.
- Use the hammer with broken pump.
- Take the jug of water.
- Go back inside, walk through the house and go to front garden.
- Check the letter box. Take letters three times.
- Read the letter in the box.
- Take crystal from the box.
- Go back inside the house and enter Arthur's room.
- Check Arthur's machine.
- Read the notebook.
- Pour jug of water into the funnel.
- Put the crystal into the slot.
- Check ohm and lbs indicators which are located around the crystal slot.
- Adjust ohm switch and weight switch on the left to match the indicator readings.
- Push the button on the floor, beside the bed.
- You should now see a pattern on the floor, with the text Clonfira. Study the pattern.
- Use Arthur's machine again and enter the pattern with buttons that are labeled "?".
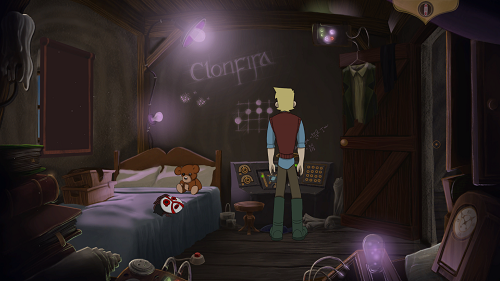 The pattern on the wall.
- Exit the room and pick up footstool from the house.
- Go back to the shed.
- Use the light switch.
- Try to pick up an item labeled "?" from the shelf.
- Use stool with the broken shelf.
- Pick up Arthur's puzzle box.
- Return to the house.
- Go to Arthur's room and pick up the mask.
- Exit the room and use the mask on Dougal.
- When Lily comes down, use the puzzle box on Lily. Watch the sequence in which the dance moves happen, then operate the puzzle box and choose corresponding moves in the same order by rotating the dial.
| The correct moves below, compare to this dial. | 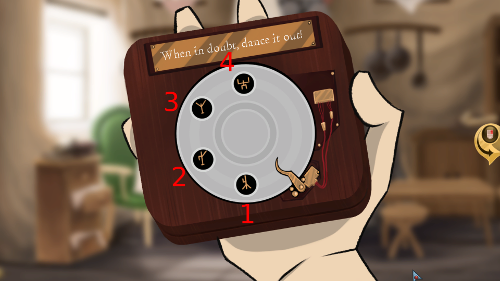 Dial. Dial. |
| 1 | 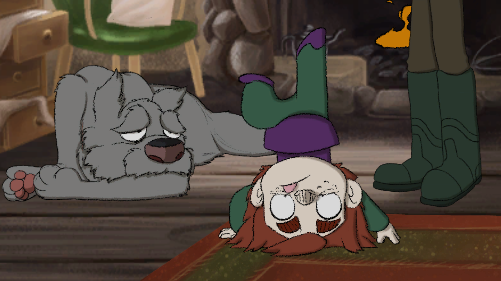 Lily's move. Lily's move. |
| 2 | 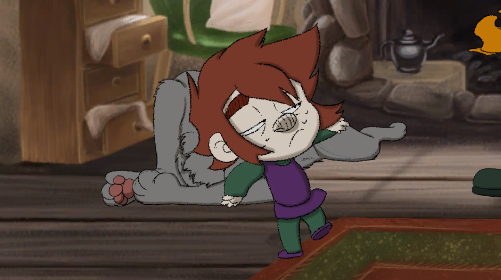 Lily's move. Lily's move. |
| 3 | 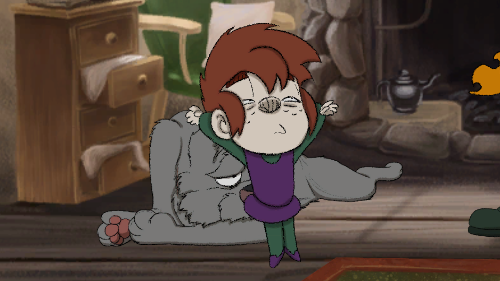 Lily's move. Lily's move. |
| 4 | 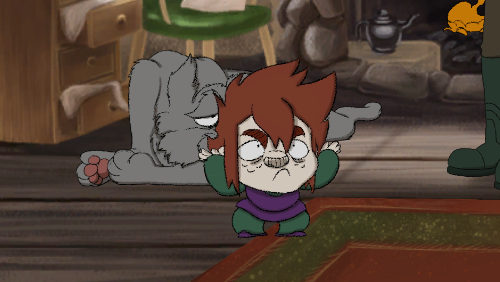 Lily's move. Lily's move. |
- When the box opens, take the key.
- Go back to the shed.
- Use the key on the keyhole in the machine.
- (As Lily) Inspect the prep table.
- Try to pick up the empty bag.
- Take the cooking pot that is behind Dougal.
- Use Dougal on the cupboard.
- Use Dougal on the door and when he's distracted, pick up oats from the ceiling.
- Inspect the prep table again to make breakfast.
- (As Aidan) Search Arthur's belongings.
- Pick up Arthur's hat.
- Pick up orb.
- Use the orb on the empty socket on the left to charge the orb.
- Take the orb and put it in the empty socket to the right as fast as you can to open the door.
- (As Lily) Go the right side of the house. Try to pick up the spanner.
- Search the coal bunker to find a bone.
- Search the tractor engine to get a rope.
- Tie the rope to the tree branch.
- Use the bone on Dougal.
- Watch the cutscene, after which you automatically get a sword.
- Use the sword on the evil gnome.
- Go inside the house.
- (As Aidan) Touch the lamp to form a bridge and then move on.
- Touch the yellow lamp to form a bridge towards the doorway. Go to the blue lamp. Touch the blue lamp to open the door, but it will change bridge positions. Go along the existing bridges to the doorway and use the exit.
- (As Lily) Go to Arthur's room and pick up Sir Fuzzle Puff (teddy).
- Go to the shed.
- Use teddy on the adventure machine.
- Pick up a piece of paper to get a note.
- Use the note on Dougal.
- Use the adventure machine.
- (As Aidan) Touch the lamp to form a bridge and then move on.
- Go to the lower right corner and touch the lamp. Walk on the bridge that forms.
- Touch the lamp and walk over to the door in the upper right corner.
- Touch the lamp and walk to the blue lamp.
- Touch the blue lamp to open the door and then walk to the lower right corner again.
- Touch the lamp and go to the middle island.
- Touch the lamp to form a bridge to the door and use the exit.
- (As Lily) Exit the laboratory.
- (As Aidan) Walk on to meet Merr.
- (As Lily) Touch the lamp and then move on and walk until you meet a monster.
- Use the sword on the monster's tentacle.
- (As Aidan) Follow Merr and enter the shrine.
- Pick up the glove from the corner.
- Go through the door and use the glove on blue light (the glove changes to crystal in the inventory).
- Use the crystal on machine.
- Pick up the screwdriver from the corner.
- Go through the door and use the screwdriver on big flower to active the screen over the waterfall.
- Walk closer to the waterfall to scare off creature and then place the hat on the receptacle.
- Study the cubes in the water to find a pattern.
- Use the panel on the wall and enter the pattern using the buttons.
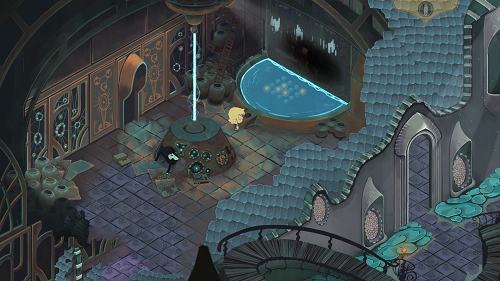 The correct pattern in the pool.
- (As Lily) Walk up to meet Bugsy.
(You will see a cutscene with Aidan going back home and meeting Nina.)
- Take vine.
- Use Bugsy with the ledge.
- Jump in the flower.
- Use pen exit.
- Keep walking right until you find three plants. Pick up birrel fur.
- Show birrel fur to Bugsy.
- Go inside the plant that Bugsy is pointing.
- (As Aidan) Go to the walkway of the dam.
- Use the ladder.
- Use the mask on the cat on the wall.
- Pick up the key from the broken flowerpot.
- Use the key to open padlock (you will get the padlock in the inventory).
- Open unlocked vent.
- Use the padlock on the door handle.
- Open unlocked vent.
- Enter the building through the opened window.
- Use another window to go out again.
- Try to cross the dam to go to Nina's lab.
- Immediately after the bird attacks, pick up a feather.
- Use the feather on cat.
- Go across to Nina's lab.
- After Nina tells you what she needs, exit the lab and walk right to the lift and use the lift.
- Take magnetron from the microwave oven.
- Go out through the window again.
- Cross the dam to Nina's lab.
- Enter Nina's lab and give magnetron to Nina.
- Go through the portal on the wall.
- (As Lily) Walk along the path to find Arthur's grave.
- (As Aidan) Follow Lily's appearance along the path to the right.
- (As Lily) Talk to dad. While he is distracting illusion monster, use Bugsy with the ledge.
- Walk to the platform over illusion monster.
- Use vine on illusion monster.
- Use Bugsy with vine.
- Jump down on Aidan.
- Use vine with turret.
- (As Aidan) Walk left, and keep chasing Merr.
- (As Lily) Enter the shrine.
- Look at the pool.
- Try to take the glove and a radio conversation follows.
- Take the glove.
- Exit the shrine and go back to illusion monster.
- Throw the glove to gas.
- Push illusion monster.
- Watch cutscenes that follow.
 The game is finished!
THE GAME IS FINISHED. CONGRATULATIONS!!!